![]()
![]()
| Ministry of Agriculture and Water Resources: | |
| Salem Bamuflah | Director General of Agriculture Research Centre of the Western Region. |
| Fish Farm Centre Project: | |
| K. Allen | Project Manager |
| S. A. Al-Thobaity | Project Co-Manager |
| M. Arada | Fisheries Biologist |
| Feisal A. Bukhari | Fisheries Biologist |
| Magd Elbawah | Hatcheries Responsible |
| Adel Badawi | General Service Responsible |
| Met also at FFC Project: | |
| Victor C. Salin | Senior Budget and Financial Officer, from FAO, Riyadh, on mission in Jeddah |
| FAO Headquarters, Rome: | |
| Coche, A.G. | Senior Fisheries Resources Office (Aquaculture) |
| Ziesler, R. | Project Operations Officer |
| Padroni, G. | Personnel Officer |
| Padlan, P.G. | Senior Fisheries Officer (Aquaculture) |
| Vincke, M. | Senior Fisheries Officer (Aquaculture) |
| Other persons in the FAO Fisheries Department: | |
| Welcomme, R. L. | |
| Garcia, S. | |
| Kapetsky, J.K. | |

Fig.1: Diagram of the Shoreline Lagoon at the Fish Farming Centre Site, Jeddah

Fig.2: Approximate limit of suitable depth (between 1 and 2 m deep) for fishpen at the Fish Farming Centre shoreline

Fig.3 - Detail design for the two demonstration fishpens
| Material and equipment: | |
| - Ready made nets (210/60 – 14 mm) See detail in Fig. 6 | 600 m1 |
| - String 210/60 | 40 bobbins1 |
| - Plastic needle No. 8 (Fig.7) | 301 |
| - Side poles (Fig.4B) | 1701 |
| - Corner poles (Fig.4A) | 10 |
| - Pressure line PVC (diameter 2 in) to join the pole tops (Fig.4a) | 500 m1 |
| - Sinkers (Fig.7) | 1 700 units1 |
1 For all the above, additional quantity included as spares

Fig. 4 - The detail design for the two types of poles
Note: The length of part “c” must be adjusted when all the poles have been installed; it depends on the level of the maximum high tide. For a jumper species such as the mullet, part “c” should be made higher.

Fig. 5 - Steps in constructing a side pole
Prepare the bottom part (see Photo No. 1):
jute bag holding the concrete (see Photo No. 1)
Prepare the top part (see Photo No. 2):
reducer (ordinary PVC) 4 to 2 in
Fill up the bottom part with concrete which needs to be well packed by stirring the iron rod and by slightly hammering the PVC (see Photo No. 3 and 4)
Join the top and the bottom parts (see Photo No. 5)
Fill up the top part
Pole is ready after 24 to 48 hours
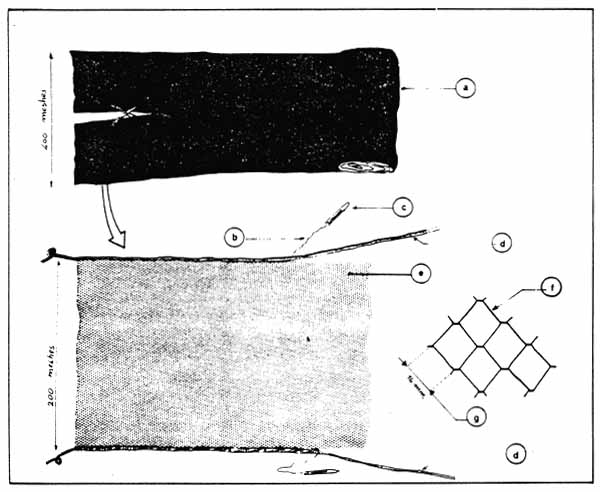
Fig. 6 - Details of netting
Net 210/60 – 14 mm, delivered from factory by sheet of 400 meshes (about 7 m wide and 40 m long), Half of the sheet with (200 meshes) will be used as net side barrier after being attached with a 10 mm diameter rope.
String 210/60
Special plastic needle
10 mm diameter rope
Net 210/60 – 14 mm
Mesh size: 210/60
14 mm is the distance between two knots

Fig. 7 - Sinkers (see Photos 6, 7 and 8)
Sinkers are made with ordinary PVC (diameter 2 in and 20 cm long).
The diameter of the two extremes are slightly extended by heating.
Fill up the sinkers with concrete.
Diagram of a sinker.
The sinkers are strongly attached on the bottom side of the net with string 210/60 (f).

Fig. 8 - Net installation
1. Water pressure from a 2 HP water pump.
2. Furrow dug by water pressure.
3. & 4. Sinkers and net are carefully laid into the furrow.
5. Bottom furrow closing.
6. Digging direction.
7. Hose (diameter 2 in) used to orient the water pressure.
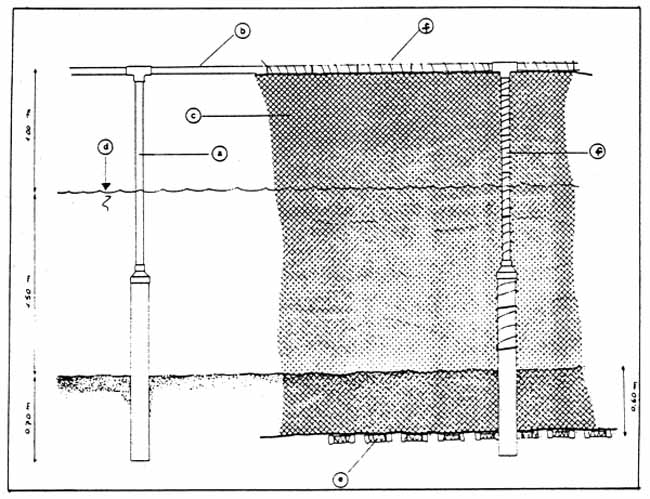
Fig. 9 - Diagram of installed net
-side pole
-top edge of the fishpen
-net 210/60 – 14 mm
-water level
-sinker
-side of net needs to be tied to the side pole up to the top edge of the fishpen and to the pipes connecting the side poles.
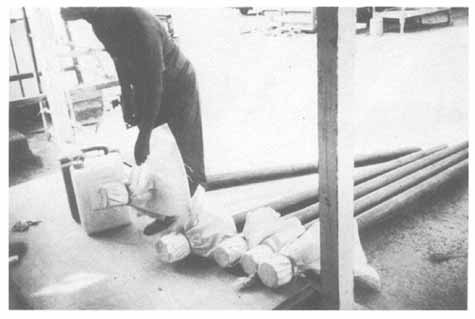
Photo No. 1 - Preparation of the bottom part of the pole.
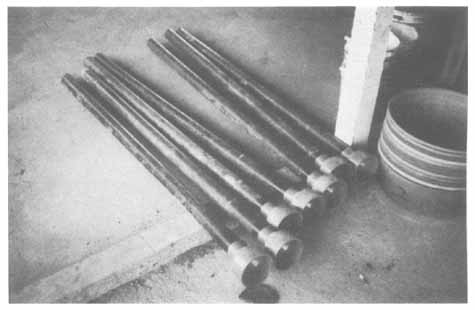
Photo No. 2 - Preparation of the top part of the pole.
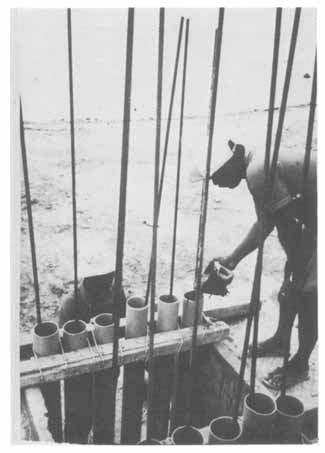
Photo No. 3 - Filling pole with concrete.
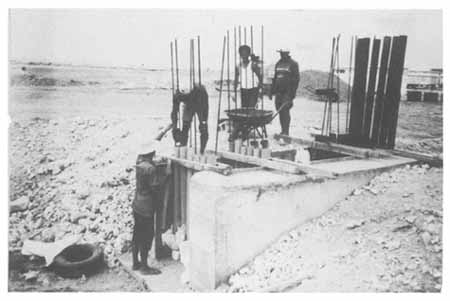
Photo No. 4 - Filling pole with concrete
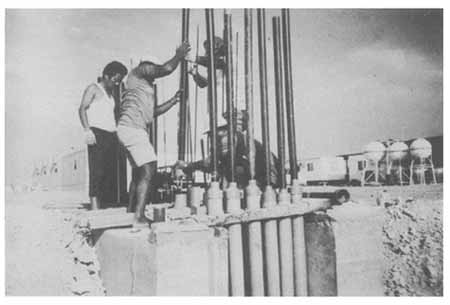
Photo No. 5 - Joining the top and the bottom parts of the pole.
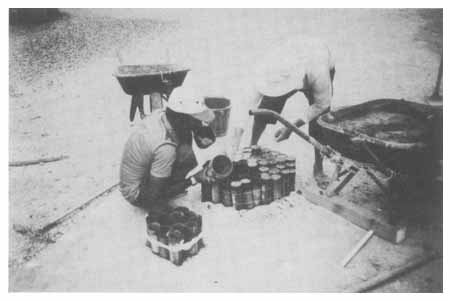
Photo No. 6 - Fabrication of sinkers.
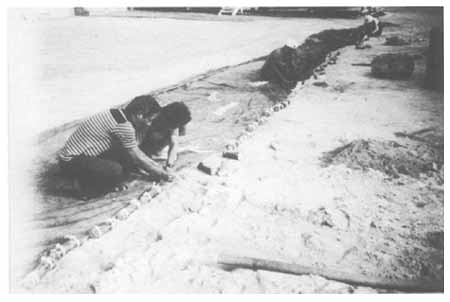
Photo No. 7 - Attaching sinkers to the bottom of the net.
Photo No. 8 - Attaching sinkers.

![]()
![]()