


FIAP is a Forest Investment Appraisal Package. It calculates the economic performance of forestry plantations according to your selection of species, prices, costs and other factors. It is designed for the evaluation of a single coupe which by definition within the package must have a single felling year. This User Guide tells you what you need to know to run FIAP.
This version of FIAP (PC-FIAP) is designed to run on a personal computer using standard spreadsheet software, in this case Excel v.5.Oc for Windows. Although it uses Excel as a base arid is similar in layout, the package is a template and cannot be saved over or modified by mistake. PC-FIAP is customised for forest managers, but it uses ordinary spreadsheet conventions. If you are not familiar with spreadsheets, it may be wise to read the introductory chapters of the User Guide for Excel v.5.Oc for Windows, although a few notes on spreadsheets are included in this FIAP User Guide.
Wide flexibility is offered within FIAP. You can work with up to 20 productive crop components at once, with up to eight different price-size curves, and carry out What-If? analysis to find how results are affected by altering any of the costs, prices or conditions you have selected. You can include miscellaneous income and grants, and you can view results as graphs or tables.
Because FIAP runs under Windows, you can run other Windows applications at the same time, and these may be able to interact with FIAP. For example, specialist data can be prepared in another spreadsheet or database for use in FIAP, or FIAP results can be linked to reports in other applications such as word-processors. To make use of such facilities, or to find out about computer basics such as files and directories or how to use a mouse, refer to the appropriate manuals or on-line help systems, including those for Excel v.5.Oc for Windows.
![]()
To start Windows, follow your computer’s own instructions. Eg, at the C:\> prompt, you may have to type WIN and press Enter. Within PCFIAP Windows, find the icon for FIAP, double-click it with the mouse (position the cursor over the icon and press the mouse button twice in quick succession) or highlight the icon and press Enter.
The loading process may take a few moments - the cursor will change to an hourglass indicating you should wait. When loading has completed you will be faced with a message window welcoming you to FIAP. Click on the Start FIAP button to proceed.

You will now be presented with a screen asking if you wish to Create a New appraisal or Edit an existing one. Use the mouse to click on the option required. If you create a New appraisal you are presented with a series of dialogue boxes that allow entry of details such as site name, location and the analyst. Use the mouse to move from box to box (alternately the TAB key will move through the boxes in order). Mistakes can be corrected using the Delete or Backspace keys or at a later stage - see Section 2.1. When finished click on OK. You will now move onto the package itself. The initial screen is the What-If screen. The next section deals with the different screens available.
You can move the cell pointer to any visible cell by placing the mouse pointer on that cell and clicking the left-hand button. However the screen is likely to be too large to be viewed at once so the arrow keys move the cursor or cell pointer about the screen, which scrolls when the cursor reaches the edge. Scroll bars are provided on the right of the screen and along the bottom: click the arrows or drag the slide with the mouse. Page Up and Page Down keys move a page at a time, and the horizontal equivalent is achieved by holding down the Control (Ctrl) key and pressing the right or left arrow key.
At the top of the screen, just below the title, is a row of words with the initial letter underlined. Under each of these is a pop-down menu of commands customised for forest managers.
![]()
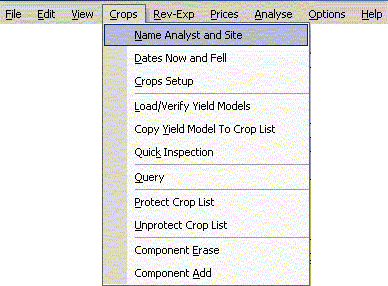
Access these menus either by moving the mouse pointer to the word and clicking the left-hand button, or by pressing the Alt key followed by the underlined letter. Select the command either by typing the underlined letter of the command in the pop-down menu, or by clicking it with the mouse, or moving the highlight down to the command you want (with the mouse or the arrow keys) and pressing Enter. For instance in the example to the left the Query option from the Crops menu could be chosen by using the mouse or by typing Alt and C followed by Q. The use of these commands is described at appropriate points throughout this User Guide.
For those unfamiliar with spreadsheets, they work like huge sheets of paper divided into vertical columns and horizontal rows and consisting of cells where each row and column intersect. Into these cells you can enter text or figures. Place the cell pointer where you want make the entry (use the arrow keys or click the cell), then just type it out and press Enter or the large “carriage return key, or move any of the arrow keys.
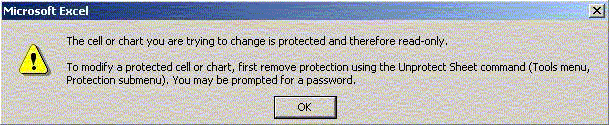
FIAP uses many formulae, some of considerable complexity, but you do not have to concern yourself with these Either they are protected to prevent inadvertently altering them or, where you can overwrite them as part of the analysis, FIAP also has commands to reinstate them should you change your mind. This User Guide has instructions for reinstating simple entries manually. The cells you can write in have a white background and any entries they contain are in blue. If try and change a cell that is protected (locked) you will get an error message. Click on OK to continue.
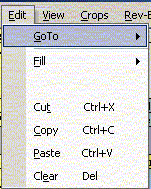
Entering data may be made easier with the Editing commands available in the Edit menu: Cut, Copy, Paste and Clear; and Fill (Up and Down). These and their short-cut keys (see diagram) perform exactly as the standard Excel commands, with the exception that data cannot be transferred between different screens.
If you should make a mistake of any sort, you can undo the change if you press
C (hold down the Control (Ctrl) key while you type Z) BEFORE YOU DO
ANYTHING ELSE. Undo only takes back the last command.

The default option for FIAP is manual recalculation. This means that when new data is added or existing data is amended FIAP will NOT automatically update any relevant figures. To update the user must click the button marked Calc that appears on each screen that shows variables that change. Automatic recalculation means that any change in a single cell are immediately reflected in all relevant cells. It switch between the two modes use the Options menu and choose the option required. The one currently in use will be blanked out.
FIAP consists of 6 different screens which are detailed below and are dealt with in more detail in the relevant sections of this guide. There are a number of different ways to move between them:
![]()
the tabs at the bottom of the screen (see diagram) can be clicked with the mouse.
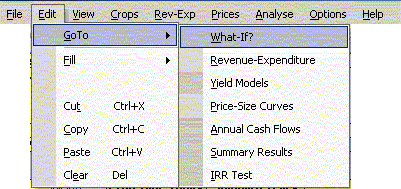
the Goto command can be selected from the Edit menu

the Goto command can be selected from the View menu
Use of the menu is detailed in section 1.3.2.

This is the most important screen of the package. The What-If screen can be thought of as the ‘master’ screen that brings the other screens together. The screen contains data on site information, overheads, time scales, crop components, wind hazard and yields. Typical use of the package will involve constantly returning from the other screens to the What-If screen.
The What-If screen is dealt with in sections 2 to 4.
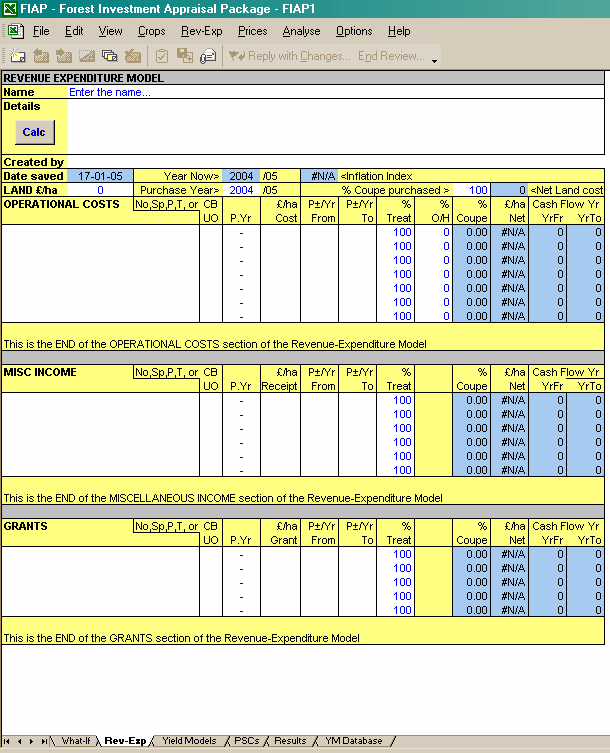
The Rev-Exp screen contains the Revenue- Expenditure model that details costs, miscellaneous income from minor forest produce, and grants (if any). There is space for site information, descriptive detail of the model etc. The screen is small to begin with but all sections can be easily expanded to allow for extremely complicated analysis. Data can be entered and grouped in a variety of convenient ways. Revenue and Expenditure is dealt with in section 5.
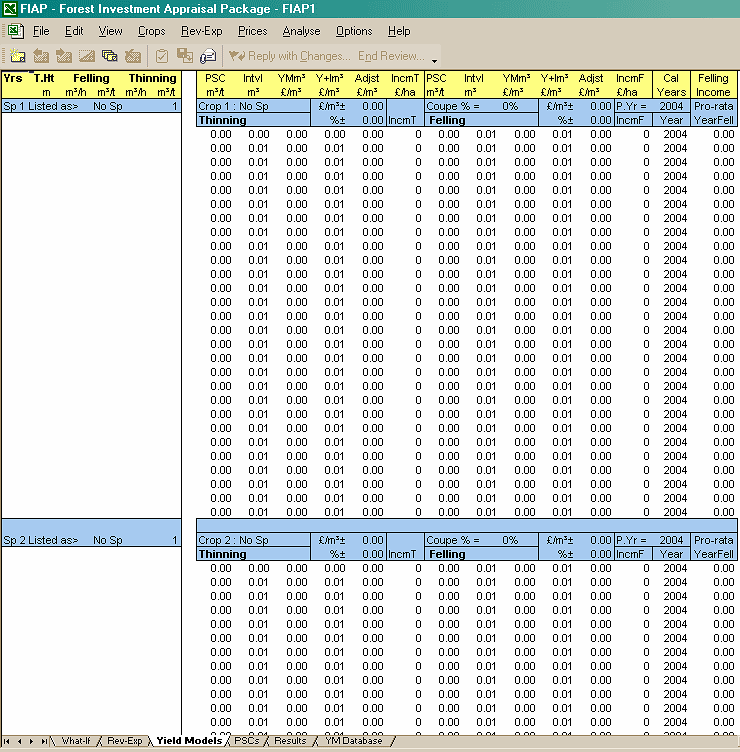
The Yield models screen gives a detailed breakdown of the yield models currently in use. See section 7.
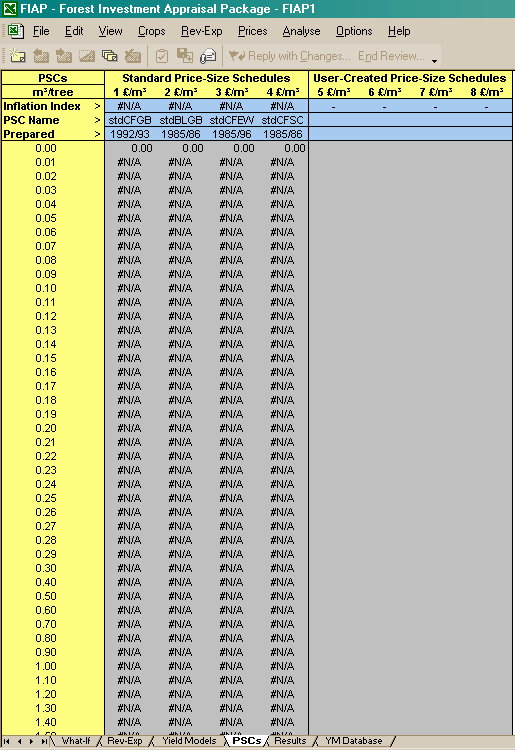
The PSCs screen details the price-size curves (PSCs) used by the model. FIAP contains four standard long- term PSC’s prepared by the Forestry Commission. There is space for four more price-size curves that may be defined by the user to reflect local data. There is also the option of displaying any of the curves graphically. Price Size curves are dealt with in section 6.
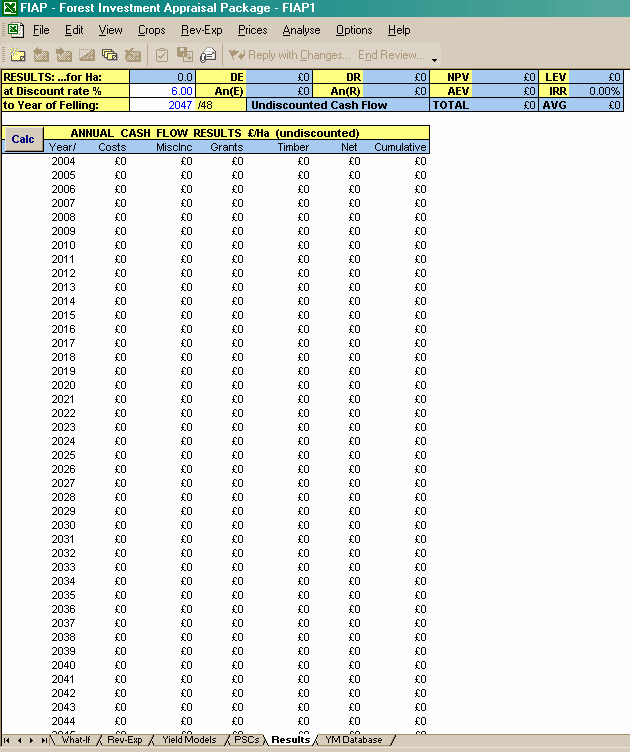
As the name suggests the results screen is where the appraisal results can be found. It is dealt with in section 8. There are ten standard summary results shown at all times and there is the option of calculation on a per hectare basis or for the coupe as a whole. The required discount rate is entered on this screen. Results can be shown graphically if required. In addition there is the facility to calculate the year of maximum discounted revenue.
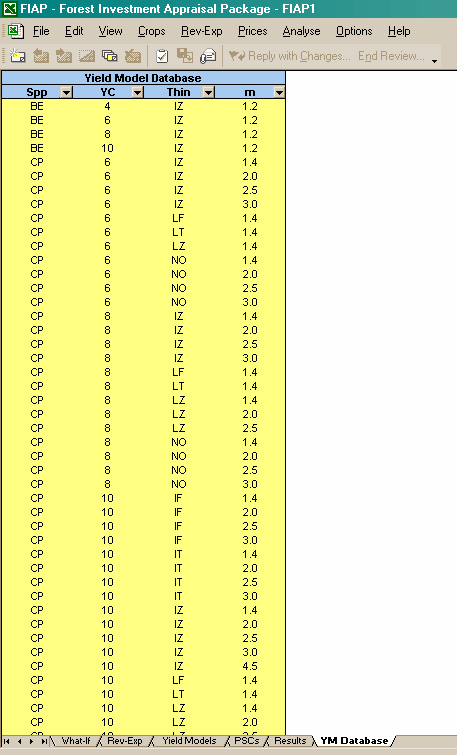
This screen provides a point of reference for all the various yield models available in the package. There is the option of sorting by yield class, thinning type and initial spacing. See section 7.
There are five ways you can alter the amount you can see on screen.
The screen surrounds
You can see more without reducing the scale of text and figures by removing the screen surrounds - e.g., the worksheet tab, the menu bar, the vertical and horizontal scroll bars and the status bar. Under the View menu there are three Screen commands to remove or replace these features according to needs or preferences.
Zooming in or out
Irrespective of screen surrounds or screen resolution, you can zoom. Under the View menu there are three commands which allow you to zoom in or out or reset the screen to a default level. That default was chosen at a level which seemed convenient, but it can be altered to suit personal preference (View, Screen, Prefs).
Setting titles
Sometimes you have to work with longer columns or rows than can be viewed on screen but it is useful to keep the column or row headings visible. This is done by setting titles, where everything above or to the left of the cell pointer (or both) is frozen, but the rest of the screen can move. Under the View menu there are four commands which enable you to set or remove titles.
Splitting the screen
You can view two parts of FIAP at once by splitting the window into panes, horizontally or vertically. Place the mouse arrow either just above the top arrow on the vertical scroll bar or to the right of the bottom horizontal scroll bar until a two arrowed icon appears. Drag the two-arrowed icon (by holding down the mouse button and moving the mouse) to where you want it. Switch between the panes by moving the mouse pointer and clicking, or pressing F6. You can scroll each pane independently. To remove the panes double-click on the dividing line. This can be a very useful way of displaying more information at once.
Screen resolution
You may be able to alter your screen resolution if your monitor and/or computer system is powerful enough. The basic resolution is 640x480, but some monitors permit higher figures - e.g., 800x600 or 1027x768. The higher the resolution the more can be seen on screen, but the size of each cell is reduced. Comfort of working is affected by monitor size and quality, and personal preference.
On-line Help is available in FIAP by use of the Help menu. There is both a help system and a glossary explaining common terms. Navigate your way around using the mouse. Any word underlined in green can be clicked on at which point further explanation will be provided.
The rest of this User Guide provides more detailed instructions for the use of FIAP. (Sections 2-7 cover the essential items of input before analysis can begin.)
Sections 2-4 cover the What-if? screen, detailing how to enter the requisite data and load the yield models you want to work with.
Section 5 explains how to enter data in the Revenue-Expenditure model, expanding it as may be needed, and saving parts of it to disk or retrieving files already saved.
Section 6 describes the creation and use of standard or local price-size curves.
Section 7 describes the Yield Model Database.
Section 8 describes how to get results from FIAP, and how to use its graphs.
Section 9 provides notes on a number of working options within FIAP.
Section 10 describes how to use the print commands within FIAP.
Section 11 contains details of the housekeeping commands, which allow the user to save versions of FIAP on disk, and later retrieve them, and how to exit FIAP.
Section 12 details short-cut key strokes for the advanced user.
